Installation Guide
for
Au J1939 Simulator Remote Terminal
By Au Group Electronics
March 2008
Au Group Electronics provides 6 editions of SAE-J1939 simulator for various users' needs. Three of the PLUS editions can be used with a PC remote terminal program:
-
Au® SAE-J1939 Simulator - Engine Basic Plus Edition
-
Au® SAE-J1939 Simulator - Engine Premium Plus Edition
-
Au® SAE-J1939 Simulator - Vehicle Platinum Plus Edition
PLUS Edition = Non-Plus Edition + PC Remote Terminal Program
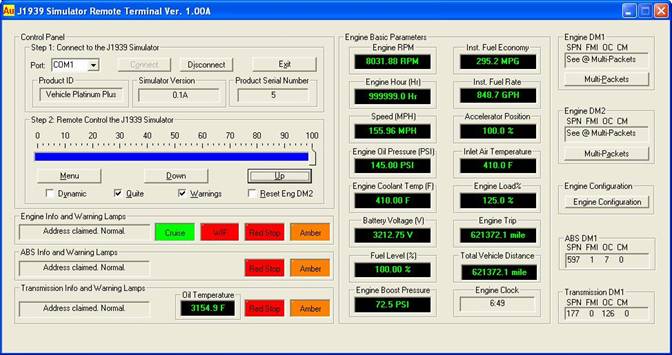
What you need before install the Au® SAE-J1939 Simulator Remote Terminal software
-
A "PLUS” Edition of Au® SAE-J1939 Simulator.
-
PC software –The installation program "AU setup J1939 Simulator Remote Terminal V1.00A" will be provided when a "PLUS” Edition of Au® SAE-J1939 Simulator is ordered.
-
A PC equipped with serial port or PC equipped with USB port + “USB to Serial Converter".
-
A serial cable to connect PC with the Au® SAE-J1939 Simulator.
Step by step guide on installing the software to your PC.
-
Double click the “Setup J1939 Simulator Remote Terminal V1.00A” installation file, as shown in figure 1.

Figure 1 - “Setup J1939 Simulator Remote Terminal V1.00A” installation file
-
Open file – security warning window pop up, click “Run” to continue ( figure 2 )
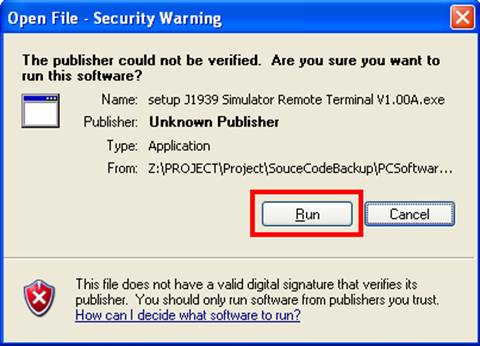
Figure 2 - “Open File – Security Warning” window
-
“Welcome to the Au J1939 Simulator Remote Terminal Setup Wizard” window pop up, click “Next” to continue (figure 3).
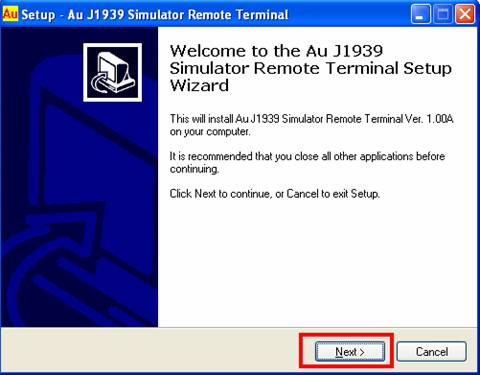
Figure 3 - “Welcome to the Au J1939 Simulator Remote Terminal Setup Wizard” window
-
“License Agreement” window pop up, please read the license agreement and select “I accept the agreement”, click “Next” to continue (figure 4).
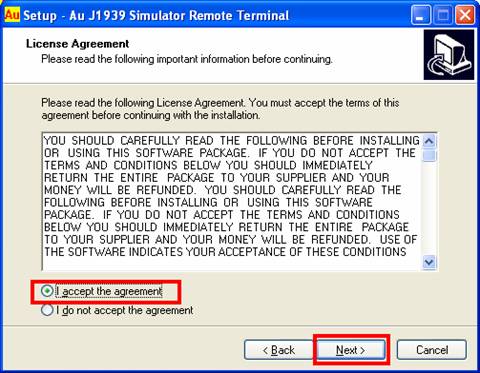
Figure 4 – License Agreement window
-
“Select Destination Location” window pop up, use the default folder, and click “Next” to continue (figure 5).
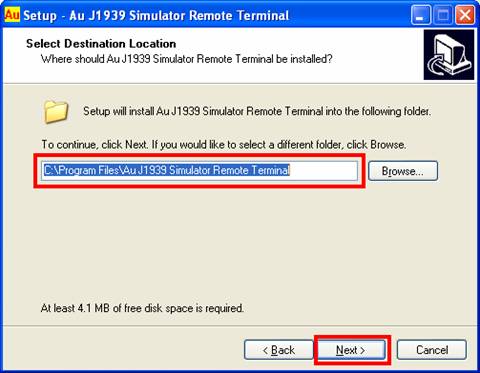
Figure 5 - Select Destination Location window
-
“Select Start Menu Folder” window pop up, use the default folder and click “Next” to continue (figure 6).
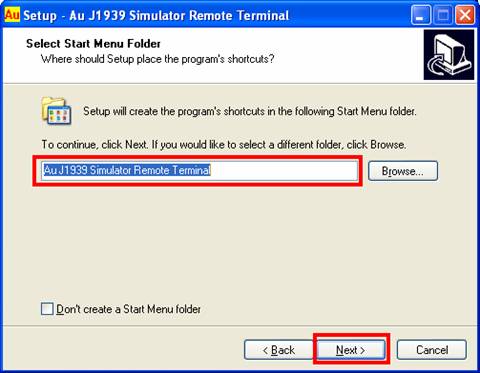
Figure 6 - Select Start Menu Folder” window
-
“Select Additional Tasks” window pop up, check both “Create a desktop icon, and Create a Quick Launch icon”, click “Next” to continue (figure 7)
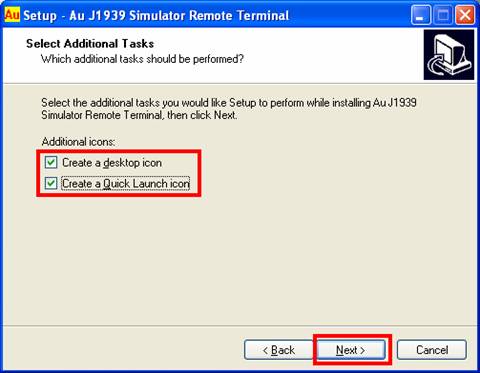
Figure 7 – “Select Additional Tasks “window
-
“Ready to Install” window pop up, click “Install” (figure 8)
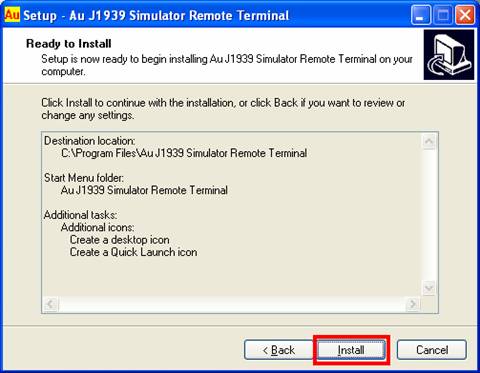
Figure 8 – “Ready to Install” window
-
“Completing the Au J1939 Simulator Remote Terminal Setup Wizard” window pop up, check “launch Au J1939 Simulator Remote Terminal”, and click “Finish” (figure 9)
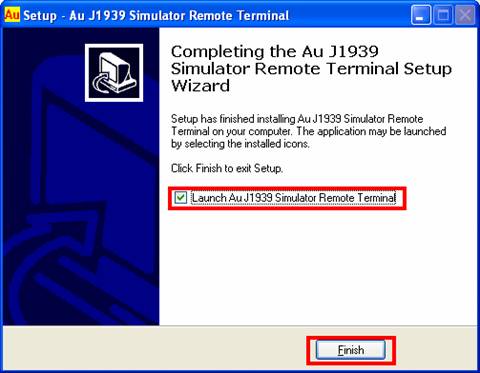
Figure 9 – Completing the Au J1939 Simulator Remote Terminal Setup Wizard
Then an “Au J1939 Simulator Remote Terminal” program will open up. After connect your PC with the J1939 Simulator, and set the correct serial port, a screen similar to the front page of this document will show up. (A "Vehicle Platinum Plus Edition" is illustrated in this document; other Editions might have different information on the screen.)


